Sunday, August 31, 2014

Nokia 6303c New Charging Not Supported Solution 100 Tested

Nokia 6303i charging not supported solution 100% tested Now I Share this solution Its many time tested For This Tutorial .see this Just Replace It 47k Parts Show on Diagram In Red Marked Ihope Solved Your Mission This Problem
Nokia
Read More..

How To Root Samsung Galaxy Ace 2 GT I8160 Using I8160XXMF2 Android 4 1 2 Jelly Bean Firmware Guide


Samsung recently released official Android 4.1.2 Jelly Bean update with firmware build number I8160XXMF2 for the international version of Galaxy Ace 2 (GT-I8160). The new official firmware is currently available for the Galaxy Ace 2 users in most Southeast Asian countries.
Samsung Galaxy Ace 2 I8160 users who have already updated their devices with Android 4.1.2 XXMF2 Jelly Bean, may root their devices using the tutorial below.
Disclaimer: Rooting voids the warranty of your device. We and the developer of this rooting procedures shall not be held responsible if any undesirable outcomes may happen to your device. use of this root guide is solely at your own risk!
Pre-requisites
1. Install USB Driver for Samsung Galaxy Ace 2 on the computer.
2. Enable USB Debugging Mode on the phone by navigating to Settings >> Developer Options.
3. Make a backup of all your important data before following the guide.
4. The Galaxy Ace 2 should be factory unlocked and not locked to any particular carrier.
5. Ensure the battery of the phone is charged more than 80 per cent.
6. The Root Package file works only on Samsung Galaxy Ace 2 I8160. Applying this to any incorrect variant might brick the device. Verify the model number of the Galaxy Ace 2 by navigating to Settings >> About Phone.
File Required
1. Root Package for Galaxy Ace 2 I8160 (root.zip)
Steps to Root Galaxy Ace 2 I8160 Running on Android 4.1.2 XXMF2 Jelly Bean Firmware
Step 1: Connect the Galaxy Ace 2 to the computer using USB cable.
Step 2: Copy the root.zip file to the external SD card of your phone.
Step 3: Once the file transfer process is completed, switch off the phone and disconnect it from computer.
Step 4: Boot the device into stock recovery mode by pressing and holding Volume Up, Home, and Power buttons together. In recovery mode, use the Volume keys to toggle between options and Home/Power button to select the desired option.
Step 5: Select apply update from external storage then navigate to the root.zip file which was earlier copied to the SD card.
Step 6: Select the root.zip file and confirm installation.
Step 7: Once installation process is completed, return to main recovery menu and select Reboot System Now.
Samsung Galaxy Ace 2 I8160 running on Android 4.1.2 XXMF2 Jelly Bean firmware is now rooted successfully. You can now install any app that requires root permission. Verify the root status of the device by downloading Root Checker app from Google Play Store.
Note: Tested working on Galaxy Ace 2 I8160 with Android 4.1.2 XXMF2 Jelly Bean firmware, should work with other Jelly Bean firmware. Try it and let us know.
Thanks to all fellas at XDA who first tried out this rooting technique. This root method was originally posted via XDA-Developers original thread.
Click here to know How to Update Galaxy Ace 2 I8160 with official Android 4.1.2 XXMF2 Jelly Bean firmware.
Read More..

NEW HWK 2 3 0 3 Full Installer 28 10 2013

HWK 2.3.0.3 Full Installer here..
Its made for those have slowspeed internet connection...
Update date 28-10-2013

Just Download > Install Then Update box> Checkbox> Checkserver> install Do it step by step,

It will install 1 or 2 file and u will done within 2 minutes!!!

Download


Download Now
Read More..

Nokia 6600s Display Problem Solution

Nokia 6600s lcd solution.
Read More..

Saturday, August 30, 2014

Hwk V 2 3 0 4 installer offline version

This is hwk 2.3.0.4 update offline installer. there are have many problem online install for low speed internet user.So they can not install hwk box in online.So make this offline version for their.This is not official support.but this is very useful for low speed internet user.


Download  hwk 2.3.0.4 update offline installer


Read More..

Nokia 110 all hardware problems solution

Nokia 110 all hardware problems repairs solution those are nokia 110 charging problem solution,lcd light ways ,charging jumper , insert sim solution,mic problem solution mic ways.light ic jumper,ringer not work ,lcd ways,display problem solution,


Nokia 110 charging not supported solution

Nokia 110 charging problem solution
Nokia110 fake charging

Nokia 110 sim problem solution

Nokia 110 mic problem solution

Nokia c110 mmc solution

Nokia 110 lcd light jumper

Nokia 110 light ways

Nokia 110 lcd ways

Read More..

Nokia 5630 Keypad and Music Player Back Light Solution

Nokia 5630 Keypad and Music Player backlight LED Solution
nokia
Read More..

Friday, August 29, 2014

Nokia C6 01 All Solution exe

Nokia_C6-01_All Solution exe
Download
Read More..

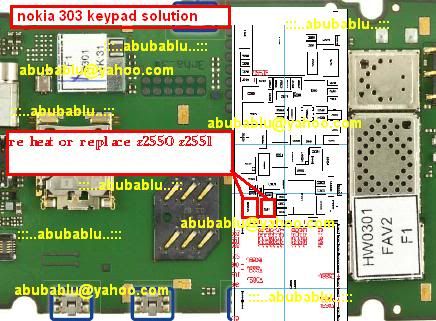
Nokia 303 keypad solution

keypad

Read More..

Nokia 1280 1616 1800 New speaker solution tested10000


Read More..

Nokia X3 01 Hands Free Ringer buzzer speaker

Nokia X3-01 Ringer speaker Solution
Read More..

Thursday, August 28, 2014

Get Update Samsung Galaxy S Duos 2 S7582 with Android 4 2 2 XXUANA3 Jelly Bean Official Firmware Using Odin Guide


Samsung has just rolled out the latest Android 4.2.2 Jelly Bean update for Galaxy S Duos 2 users in Middle East and North Africa (MENA). The new official firmware is now available as an Over-The-Air (OTA) update as well as through Samsung KIES.
Firmware details
PDA: S7582XXUANA3
CSC: S7582OJVANB1
MODEM: S7582XXUANA1
Version: Android 4.2.2
Build date: Jan 26, 2014
Regions: United Arab Emirates, Afghanistan, Egypt, Iraq, Kenya, Libya, Morocco, Nigeria, Pakistan, Saudi Arabia, South Africa, Tunisia
Samsung Galaxy S Duos 2 S7582 users who missed the OTA update notification or unable to access the update over Samsung KIES, can now download and install the same manually using our step-by-step guide.
Pre-requisites
1. Install USB Drivers for Samsung Galaxy S Duos 2 on the computer.
2. Enable USB Debugging Mode on the phone by navigating to Settings >> Developer Options.
3. Make a backup of all your important data before following the guide.
4. The Galaxy S Duos 2 should be factory unlocked and not locked to any particular carrier.
5. Ensure the battery of the phone is charged more than 80 percent.
6. The Android 4.2.2 XXUANA3 Jelly Bean firmware is compatible only with Samsung Galaxy S Duos 2 (GT-S7582). Applying this to any incorrect variant might brick the device. Verify the model number of the Galaxy S Duos 2 by navigating to Settings >> About Phone.
Files Required
1. Android 4.2.2 XXUANA3 Jelly Bean Firmware (Mirror Link) for Galaxy S Duos 2 S7582
2. Odin 3.07
Steps to Update Galaxy S Duos 2 S7582 with Android 4.2.2 XXUANA3 Jelly Bean Firmware
Step 1: Extract Firmware zip file using WinRAR/7-Zip/WinZip or any other extracting tool, you will get a .tar.md5 file and some other files (optional).
Step 2: Extract Odin zip file and you will get Odin3 v3.07.exe along with few other files.
Step 3: Switch off the Galaxy S Duos 2.
Step 4: Boot the device into Download Mode by pressing and holding Volume Down, Home and Power buttons together until a construction Android robot icon with a warning triangle appears on screen. Now press the Volume Up button to enter Download Mode.
Step 5: Run Odin on the computer as an Administrator.
Step 6: Connect the Galaxy S Duos 2 to the computer using USB cable while it is in the Download Mode. Wait until Odin detects the device. When the device is connected successfully, the ID: COM box will turn to light blue with the COM port number. Additionally, the successful connected will be indicated by a message saying Added.
Step 7: Select the following files in Odin from extracted S7582XXUANA3 firmware folder:
  • Click the PDA button and select the .tar.md5 file.
  • Click the Phone button and select file with MODEM in its name. Ignore if there is no such file.
  • Click the CSC button and select file with CSC in its name. Ignore if there is no such file.
  • Click the PIT button and select the .pit file. Ignore if there is no such file.
Step 8: In Odin, enable Auto Reboot and F. Reset Time checkboxes. Also, ensure the Re-Partition checkbox is chosen only if a .pit file was chosen in the previous step.
Step 9: Verify everything suggested in Step 7 and Step 8 is done correctly. Then hit the Start button to begin the installation process.
Step 10: Once the installation process is completed, your phone will restart and soon you will see a PASS message with green background in the left-most box at the very top of the Odin. You can now unplug the USB cable to disconnect your device from the computer.
Samsung Galaxy S Duos 2 S7582 should be now updated with Android 4.2.2 XXUANA3 Jelly Bean official firmware. Head over to Settings >> About Phone to verify the software version running on the device.
Note: If Galaxy S Duos 2 S7582 stuck at booting animation after Step 10 then go to recovery mode (press and hold the Volume Up, Home and Power buttons together) and perform Wipe data/Factory Reset and Wipe Cache Partition task before selecting reboot system now function. In recovery mode use Volume keys to navigate between options and Power key to select the option. Please note, performing wiping task will erase your device internal memory data and not external SD card data.
Read also: How to Root Galaxy S Duos 2 S7582 on Android 4.2.2 Jelly Bean and Install CWM Recovery
Read More..

Symphony t44 Mic solution

This is symphony t44 mic problem solution.It also work  symphony t44 mic line ways.mic not work and mic low voice solution.


How to do this : If your phone has this problem then first change microphone next check mic line ways,If damage mic line then make this jumper.

You may also like

Symphony  t44 charging solution
symphony t44bad contact charger


Read More..

Nokia E73 keypad Filter IC jumper ways

Nokia E73 keypad Filter IC jumper ways
nokia
Read More..

Wednesday, August 27, 2014

Setool2 Lite edition v1 11 Full XS simox Remove SIM Lock patch generator v2 1


simox Remove SIM-Lock patch generator v2.1
XS++Setool2

SUPPORTED MODELS:k320 k510 k750/D750 w200 w300 w550/w600 w 700 w800 w810 z520 z530 z550 k530 k550 k610/k618/k630 k790 k800 k810 s500 t650 w580 w610 w660 w710 w830 w850 w880 z710 z610
Download
http://rapidshare.com/files/170245213/DB2020_Free_unlocking_fixedgsm.blogspot.com.rar
Read More..

iPhone 4S Repairing and Solution Tips Part 2

iPhone Repairing and Solution Tips Part-2 :  iPhone repairing and solution is available here. Some exclusive tips and guidelines have given as below.


Home  
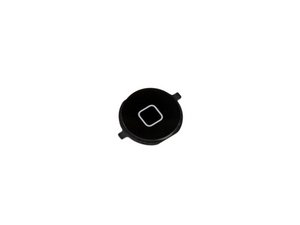
Home Button
Home  
Home Button Gasket

Home 
Home Button Ribbon Cable
iPhone  
iPhone 4S Liberation Kit
Logic  
Logic Board

Power  
Power and Sensor Cable
Power  
Power Button
Rear  
Rear Camera
Rear 
Rear Panel
Silent 
Silent Switch
SIM  
SIM Card
SIM 
SIM Card Tray
Speaker  
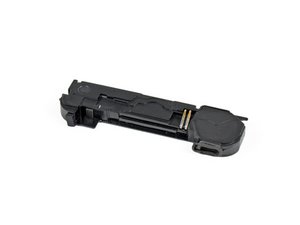
Speaker Enclosure
Upper  
Upper Antenna


Vibrator  
Vibrator
Volume  
Volume Button


More tips are available here http://www.ifixit.com/Device/iPhone_4S
Read More..

Download Odin 1 85

Odin is the most used and probably best software to change your smartphone ROM or firmware, root it and it helps you do pretty much everything you want with your phone. Odin 1.85 is really simple to use, but you need to be very careful when changing settings, because if you tick a wrong checkbox you can damage or even brick your device. If you don’t know how to use Odin, then you need to read a guide and fortunately there are guides for virtually every smartphone on the market.
There are a few pieces of software that allow you to flash ROMs on your device, but Odin is the most used one and most rooting / updating guides teach you how to do it using Odin, so it’s recommended to download it.
Please note that you only need Odin if you want to root your device or update it to a custom ROM. If you only want to update it to an official firmware, then you have to use the phone maker’s own software and  there are lower risks.
Updating your device is really recommended because updates come with a lot of improvements, bug fixes and more features. It’s up to you if you prefer to use a custom, unofficial ROM or an official one. you can find guides to update your device here.
Rooting your device offers you a lot of advantages, but not everyone needs it. With a rooted device you have more control over it, you can install more apps that otherwise wouldn’t work and can customize your phone better. Some of the changes that can be done to a rooted device include custom themes, recovery images, custom bootloaders, toolbox, boot images and more. Also you can do a full backup of your device if it is rooted. You can find guides to root your device here.
Download Odin 1.85 here.
Read More..

Nokia 6303i handfree solution tested 100

325fc78c01esolut.jpg
Read More..

Tuesday, August 26, 2014

How to Easy Update Galaxy S4 Mini LTE I9195 with Android 4 2 2 XXUBML4 JB Official Firmware

Samsung has just rolled out another Android 4.2.2 Jelly Bean update with base firmware I9195XXUBML4 for the LTE version of the Galaxy S4 Mini (GT-I9195). The new official firmware is currently available as an Over-The-Air (OTA) update as well as through Samsung KIES.
Firmware details
  1. PDA: I9195XXUBML4
  2. CSC: I9195QBTBML4
  3. MODEM: I9195XXUBML4
  4. Version: Android 4.2.2
  5. Build date: Dec 20, 2013
  6. Regions: Germany (La Fleur)

Samsung Galaxy S4 Mini (LTE) I9195 users who missed the OTA update notification or unable to access the update over Samsung KIES, and those who are residing outside Germany can now download and install the same manually, using our step-by-step guide.

Pre-requisites
1. Install USB Drivers for Samsung Galaxy S4 Mini on the computer.
2. Enable USB Debugging Mode on the phone by navigating to Settings >> Developer Options.
3. Make a backup of all your important data before following the guide.
4. The Galaxy S4 Mini should be factory unlocked and not locked to any particular carrier.
5. Ensure the battery of the phone is charged more than 80 percent.
6. The Android 4.2.2 XXUBML4 Jelly Bean firmware is compatible only with the LTE version of the Samsung Galaxy S4 Mini (GT-I9195). Applying this to any incorrect variant might brick the device. Verify the model number of the Galaxy S4 Mini by navigating to Settings >> About Phone.

Files Required
1. Android 4.2.2 XXUBML4 Jelly Bean Firmware (Mirror Link)
2. Odin 3.07 (Mirror Link)

Steps to Update Galaxy S4 Mini (LTE) I9195 with Android 4.2.2 XXUBML4 Jelly Bean Firmware
Step 1: Extract Firmware zip file using WinRAR/7-Zip/WinZip or any other extracting tool, you will get a .tar.md5 file and some other files (optional).
Step 2: Extract Odin zip file and you will get Odin3 v3.07.exe along with few other files.
Step 3: Switch off the Galaxy S4 Mini.
Step 4: Boot the device into Download Mode by pressing and holding Volume DownHomeand Power buttons together until a construction Android robot icon with a warning triangle appears on screen. Now press the Volume Up button to enter Download Mode.
Step 5: Run Odin on the computer as an Administrator.
Step 6: Connect the Galaxy S4 Mini to the computer using USB cable while it is in the Download Mode. Wait until Odin detects the device. When the device is connected successfully, the ID: COM box will turn to light blue with the COM port number. Additionally, the successful connected will be indicated by a message saying Added.

Note:If the Added message does not appear, then try re-install USB drivers or changing the port on the computer.

Step 7: Select the following files in Odin from extracted I9195XXUBML4 firmware folder:

  • Click the PDA button and select the .tar.md5 file.
  • Click the Phone button and select file with MODEM in its name. Ignore if there is no such file.
  • Click the CSC button and select file with CSC in its name. Ignore if there is no such file.
  • Click the PIT button and select the .pit file. Ignore if there is no such file.
    Step 8: In Odin, enable Auto Reboot and F. Reset Time checkboxes. Also, ensure the Re-Partition checkbox is chosen only if a .pit file was chosen in the previous step.
    Step 9: Verify everything suggested in Step 7 and Step 8 is done correctly. Then hit the Startbutton to begin the installation process.
    Step 10: Once the installation process completes, your phone will restart and soon you will see a PASS message with green background in the left-most box at the very top of the Odin. You can now unplug the USB cable to disconnect it from the computer.

    Samsung Galaxy S4 Mini (LTE) I9195 should be now updated with official Android 4.2.2 XXUBML4 Jelly Bean. Head over to Settings >> About Phone to verify the software version running on the device.

    Note: If Galaxy S4 Mini (LTE) I9195 stuck at booting animation after Step 10 then go to recovery mode (press and hold the Volume Up, Home and Power buttons together) and perform Wipe data/Factory Reset and Wipe Cache Partition task before selecting reboot system now function. In recovery mode use Volume keys to navigate between options and Power key to select the option. Please note, performing wiping task will erase your device internal memory data and not external SD card data.
    Read More..

    Nokia X6 Charging not supported Problem Solution

    Nokia X6 Charging not supported solution.
    Read More..

    Nokia x3 sim way 100000


    Read More..

    Monday, August 25, 2014

    How to Reset Soft Reset Factory Reset Hard Reset HTC One M8

    Restarting HTC One M8 (Soft reset)

    If HTC One is running slower than normal, is unresponsive, or has an app that is not performing properly, try rebooting and see if that helps solve the problem.

    1. If the display is off, press the POWER button to turn it back on. If youve set up a lock screen, you need to unlock it.

    2. Press and hold the POWER button, and then tap Restart.

    3. When asked to confirm, tap Restart. 

    If your HTC One is not responding.You can still restart it by Pressing and hold the POWER and VOLUME UP buttons for at least 10 seconds. HTC One then restarts.

    Resetting HTC One M8 (Hard reset)

    If HTC One has a persistent problem that cannot be solved, you can perform a factory reset (also called a hard reset or master reset). A factory reset reverts the phone back to its initial state — the state before you turned on the phone for the first time.

    The following will be removed from the phone when you do a factory reset:
    • Your Google Account
    • All accounts youve added in Settings > Accounts & sync and the data associated with these accounts
    • Personal data that youve created or synced to the phone such as your profile, contacts, messages, email, calendar events, and more.
    • System and application data and settings
    • Downloaded apps
    Files such as your music, photos, videos, and documents can also be deleted from the storage, if you chose to do so. Be sure to back up any data and files you want to keep before you do a factory reset.

    A factory reset may not permanently erase all data from your phone, including personal information.

    Performing a factory reset from settings

    1. Go to Settings, and then tap Backup & reset.

    2. Tap Reset phone.

    3. If you want to delete media, documents, and other data from the phone storage, select Erase all data. 

    To also delete media and other data from your storage card, select Erase SD card.

    4. Tap OK.

    Performing a factory reset using hardware buttons

    If you can’t turn HTC One on or access settings, you can still perform a factory reset by using the hardware buttons on HTC One.

    The Fast boot option in Settings > Power must not be selected.

    1. Press and hold the VOLUME DOWN button, and then press and hold the POWER button.

    2. Wait for the screen with the three Android images to appear, and then release the POWER and VOLUME DOWN buttons.

    3. Press VOLUME DOWN to select FACTORY RESET, and then press the POWER
    button.

    Read More..

    Nokia 5800 N97 Themes


    Series 60
    5th Edition
    Nokia 5800 X press Music, Nokia N97Themes pack Download
    Read More..

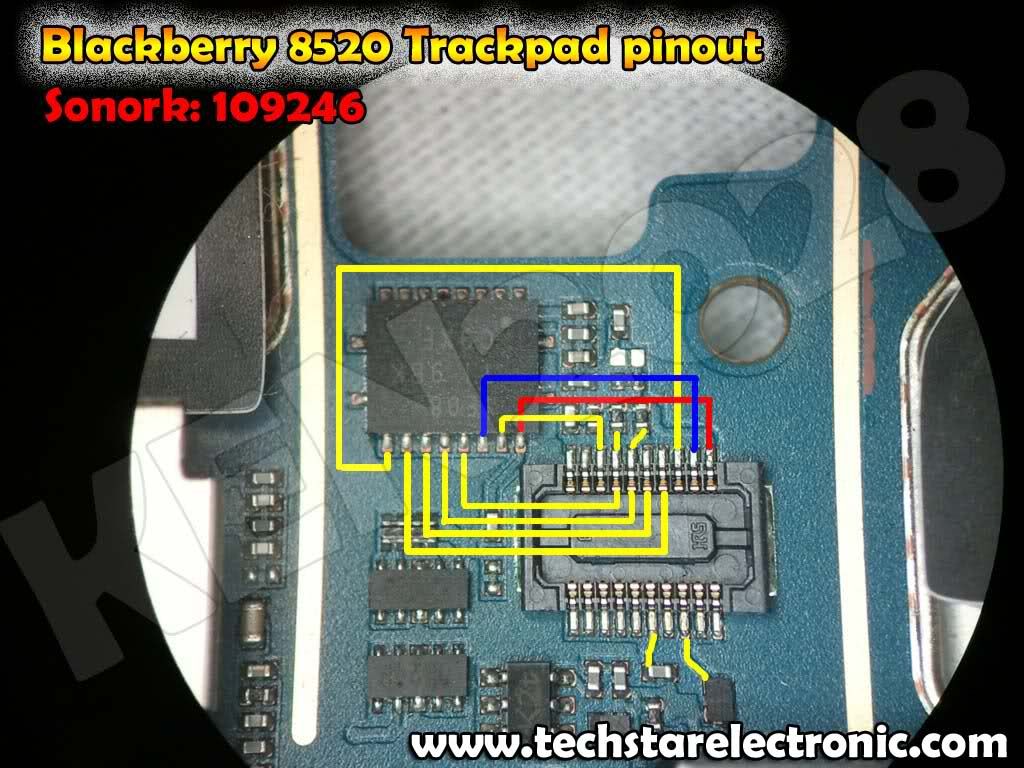
    Blackberry 8520 joystick problem ways solution 100 tested


    Read More..

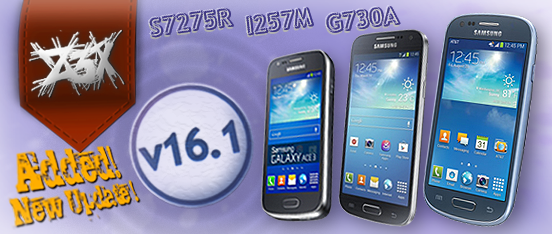
    Z3X BOX Samsung TooL Update 16 1 First in the world

    Samsung TooL Update 16.1 First in the world

    Some new hot phones just added to z3x.
    Be ready for something realy hot


    Added:


    - support SGH-I257 (direct unlock, imei repair, flashing) - first in the world
    - support SGH-i257M (direct unlock, imei repair, flashing) - first in the world
    - support SGH-G730a (direct unlock, imei repair, flashing) - first in the world

    - support GT-S7275R (direct unlock, imei repair, flashing) - first in the world
    - support GT-i8552B (direct unlock, imei repair, flashing)
    - support GT-i8262B (direct unlock, flashing)

    p.s. instead of many thanks, please post most wanted solution for you at this moment.

    DIRECT HOTFILE LINK: HERE
    Read More..

    Sunday, August 24, 2014

    Download Samsung USB Drivers for Android

    Numerous users of Samsung devices have complained about not being able to root their device or even transfer files to their computers. You should know that in order to complete such tasks, you will have to install the Samsung USB drivers on your computer.
    Using this guide is great as you will not have to use the KIES software anymore after learning how to manually flash all the required drivers for your Samsung devices.
    This post will teach you how to successfully download and install the required drivers for all Samsung devices. This shouls work with the Galaxy Series phones such as Samsung Galaxy S I9000, Galaxy S2 I9100 and I9100G, Galaxy S3 I9300 and I9305, Galaxy Note N7000 and Galaxy Note 2 N7100 and others. Basically, all the Samsung devices launched since the Samsung Galaxy S days up until now.
    The zip containing all the USB drivers is destined for developers, but it can still be a great alternative for users who are experiencing problems with Samsung’s automatic installation of drivers whenever you connect your smartphone to your PC. The file is only available with Windows computer. Also, a great thing about this download is the fact that you can simply get the drivers without the need of installing any Samsung KIES software.
    The current version of Samsung USB drivers for Mobile smartphones are ready to be installed on Windows X86 and X64 computers. Use the instructions below and learn how to download and install them on your PC:
    1. Download Samsung USB Drivers from here.
      > The first link is from Samsung own web site while the second one will take you to an XDA thread.
    2. Uninstall any previously installed USB Drivers for Samsung phones.
    3. Restart your computer.
    4. Go to the location of the download file. Extract / launch the file installation.
    5. When the new Samsung USB drivers have been installed successfully, you can reboot the computer once again.
    6. After the computer boots into normal mode, you will need to connect the device to your PC via USB cable.
    7. All drivers should now be installed and you can start moving files between your PC and Samsung phone.
    These were all the instructions that you had to go over in order to flash all the required files. If you have any other questions, please post them in our comments section and we will gladly answer all of them.
    Read More..

    Nokia Lumia 800 RM 801 latest Firmware Version 1750 0823 8862 13110 flash file free download

    Nokia Lumia 800 RM 801 latest 1750.0823.8862.13110 Firmware flash file free download Software version:1750.0823.8862.13110
    Read More..

    Nokia Asha 311 Ringer Problem Solution Ways Jumpers


    Nokia Asha 311 Ringer Problem Solution Ways Jumpers.


    Nokia Asha 311 Have two ringer and both of these ringer are shown in diagram all track and paths for two ringers are defined with different colors so look at the diagram given bellow and make these jumpers as
    Nokia
    shown in diagram they will help you to solve ringer not working low voice or ringer problems in Nokia Asha 311.some parts have single leg ground while other is used for ringer path so if any of them have ground we have to jumper on the other side of that resistance or capacitor.
    for more detail and new tips and tricks about this problem keep visiting this page we will update it timely with new diagrams.some related post are also given bellow you can read them also for more information
    Read More..

    Saturday, August 23, 2014

    How To Update Samsung Galaxy S3 Mini With Kitkat 4 4 2 Android Firmware

    If you are one of the Samsung Galaxy S3 mobile phone users Mini Android and you want to update your phone with the android firmware 4.4.2 Kitkat sialahkan follow this tutorial.

    Official firmware has not been released, but a custom ROM firmware roll. Cyanogen Mod 11 carries this update is very pleasing to the Samsung Galaxy S3 Mini.

    Please note that because it is a custom ROM firmware that may contain many bugs and will also void the warranty of your phone.

    Pre requisites:

    • Before start to update your phone, charge your phone upto 75% or more. So, then it never get switched off during the middle of the process due to low battery. If it happens, this could damage your device. So, try to charge your phone completely, before initiate the updating process.
    • All of us stored some important or personal datas on our phone. By trying rooting process they may get deleted. So, before begin the rooting process, take a backup of all the datas as you feel it is important for future use “especially contact numbers”.
    • Next enable the USB Debugging mode option in your phone by following the path “Settings > Applications > Development > USB Debugging”. This is very much important so then your Karbonn A9+ smartphone can communicate with the computer.
    • Finally, make sure that your Samsung Galaxy S3 mini was rooted. In case you are not sure about that just download the root checker app from Google Play Store and check its status.

    Disclaimer : Please be aware that the given below rooting procedures will void the manufacturer warranty of your phone. Although, the given below methods are safe it may brick your phone, in case you attempt any mistake so liability will be yours. I won’t be held responsible for that.


    Procedure to update Samsung Galaxy S3 Mini:
    • First, download the KitKat 4.4.2 firmware and Gapps package from here to your computer.
    • Once you have downloaded the files place them on your computer.
    • Next enter into the recovery mode by pressing the Volume Up button and Home Key button.
    • While holding them, you need to switch ON your phone. In case, if you fail to enter into the recovery mode by trying this method, just download the ROM Manager app from Google Play Store and it will help you to go there.
    • So, once you have entered into the recovery mode successfully, clear the cache and wipe the data with the help of appropriate steps.
    • After that select the “install zip from SD card option” and pick the Kitkat file which you have already stored on your SD card.
    • Once it was finished, select the Gapps package and allow it to install on your phone.
    • Once the process was completed, select the “Go Back > Reboot System Now” option and wait until it get finished.
    • To check whether the Kitkat 4.4.2 update was successful on your phone go to the path “Settings > About Phone” where the current firmware version will be there.
    That’s it! You have successfully updated the Kitkat 4.4.2 firmware on your Samsung Galaxy S3 Mini smartphone. Enjoy!
    Read More..

    Get Easily Install Android 4 1 2 DXAMD1 Jelly Bean Official Firmware On Samsung Galaxy S Advance I9070 with Using Odin Guide


    Samsung has rolled out official update, Android 4.1.2 Jelly Bean with base firmware DXAMD1, for the international version of Galaxy S Advance bearing model number I9070. This update is currently available for installation via OTA and Samsung KIES in supported Southeast Asia countries including Indonesia, Malaysia, Philippines, Singapore, Vietnam, and Thailand.
    Firmware details
    PDA: I9070DXAMD1
    CSC: I9070OLBAMD3
    Version: Android 4.1.2
    Built date: April, 2013
    Regions: Indonesia, Malaysia, Philippines, Singapore, Vietnam, Thailand
    The Galaxy S Advance users who fail to upgrade their devices with Android 4.1.2 DXAMD1 Jelly Bean using official method for being region specific, may follow our step-by-step guide to install the update manually.
    Pre-requisites
    1. Install USB Driver for Samsung Galaxy S Advance on the computer.
    2. Enable USB Debugging Mode.
    3. Make a backup of all your important data before following the guide.
    4. The Galaxy S Advance should be factory unlocked and not locked to any particular carrier.
    5. Ensure the battery of the phone is charged more than 80 per cent.
    6. The Android 4.1.2 DXAMD1 Jelly Bean firmware is compatible only with Samsung Galaxy S Advance I9070 and installing this on any incorrect variant will brick the device. Therefore, verify the model number of the Galaxy S Advance by navigating to Settings >> About Phone.
    Read Also :Samsung Galaxy S Advance I9070 with Android 4.1.2 XXLQL Jelly Bean Official Firmware
    File Required
    1. Android 4.1.2 DXAMD1 Jelly Bean Firmware
    2. Odin 3.07Steps to Update Galaxy S Advance I9070 on Android 4.1.2 DXAMD1 Jelly Bean Firmware
    Step 1: Extract Firmware zip file that you downloaded already from above link, you will get a .tar.md5 file and some other files.
    Step 2: Extract Odin zip file and you will get Odin3 v3.07.exe along with few other files.
    Step 3: Power off your phone. Wait 5-6 seconds for vibration to confirm complete switch off.
    Step 4: Boot the device into Download Mode by pressing and holding Volume Down + Home buttons together and then press the Power button until the device turns on. Now press the Volume Up button to enter Download Mode.
    Step 5: Run Odin on the computer as an Administrator.
    Step 6: Connect the Galaxy S Advance to the computer using USB cable while it is in the Download Mode. Wait until Odin detects the device. When the device is connected successfully, the ID: COM box will turn yellow with the COM port number. Additionally, the successful connected will be indicated by a message saying Added. If Odin fails to detect the device then re-install USB driver.
    Step 7: Choose the following files in Odin from extracted I9070DXAMD1 firmware folder by using respective checkboxes:
    • Select the PDA checkbox, and choose the file named .tar or .md5.
    • Click the Phone checkbox, and choose the file with modem in its name (ignore if there is no such file)
    • Click the CSC checkbox, and select the file with csc in its name (ignore if such file is missing)
    • Choose the PIT checkbox, and choose the .pit file. Use only the file obtained during extracting in step 1 above, otherwise ignore it.
    Step 8: In Odin, enable Auto Reboot and F. Reset Time checkboxes. Also, ensure the Re-Partition checkbox is chosen only if a .pit file was chosen in the previous step.
    Step 9: Verify everything suggested in Step 7 and Step 8 is done correctly. Then hit the START button to begin the flashing process.
    Step 10: Once flashing completed, your phone will restart and soon you will see a PASS message with green background in the left-most box at the very top of the Odin. You can now unplug the USB cable to disconnect your device from computer.
    Samsung Galaxy S Advance I9070 should be now updated with official Android 4.1.2 DXAMD1 Jelly Bean. Head over to Settings >> About Phone to verify the software version running on the device.
    Note: If Galaxy S Advance I9070 stuck at booting animation after Step 10 then go to recovery mode (press and hold the Volume Up, Home and Power buttons together) and perform Wipe data/Factory Reset and Wipe Cache Partition task before selecting reboot system now function. In recovery mode use Volume keys to navigate between options and Power key to select the option. Please note, performing wiping task will erase your device internal memory data and not external SD card data.
    Click here to know How to Root Galaxy S Advance I9070 running on Android 4.1.2 DXAMD1 Jelly Bean firmware.
    Read More..

    Samsung Galaxy Grand Duos 2 Tips and Tricks

    How to Factory Reset (Hard Reset) Samsung Galaxy Grand Duos 2

    We have our own reasons why we factory reset our device. Maybe we want to delete all the files and restore the device to its original state. It could also be the device may be malfunctioning or so slow and it needs to be reset.

    Restoring the default settings or factory reset your Samsung Galaxy Grand Duos 2 will delete all your existing files. It is recommended to backup your important files on your computer before attempting to reset your device.

    The steps below are the instructions on how to factory reset your Samsung Galaxy Grand Duos 2:

    Step 1. On your Homescreen, tap on MENU icon.

    Step 2. Select "Settings", then scroll down and tap "Backup and reset" option.

    Step 3. Then tap on “Factory Data Reset”.

    Step 4. Read warning carefully before tapping the “Reset Device”.

    Step 5. If you want to proceed in resetting your device, tap on “Delete All” to confirm the Reset.

    Now, you just need to wait while your device is resetting. It should reboot itself and you will have a new start on your Samsung Galaxy Grand Duos 2.

    You may also use the shortcut method using the code: Enter *2767*3855# on your device.


    Hard Reset:

    1. Turn off your device.

    2. Then press and hold Volume Down + Home Button + Power On.

    3. Wait for a few seconds until the Factory reset menu appears.

    4. Select "wipe data/factory reset" by using the Volume Down button.


    How to Reduce the Battery Consumption on Samsung Galaxy Grand Duos 2

    Battery Life depends on how you use your device. For Samsung Galaxy Grand Duos 2 device, if you want to save your battery to last longer hours, you may need to adjust your settings.

    All of us want to have a longer battery life on our phones. Follow these suggestions to reduce the battery consumption:

    • Switch to Sleep mode by pressing the Power key when you are not using your device. 
    • Close any apps or features when you are done using it so they will not continuously running in the background.
    • Turn off the network connection if you are out of range so that your device will stop searching for a network signal. (deactivate the Bluetooth feature, turn off the Wi-Fi feature when not in use, etc).
    • Deactivate auto-syncing of applications.
    • Decrease the backlight time.
    • Lessen the screen brightness and the screen lock timeout.


    How to Reformat Memory Card on Samsung Galaxy Grand Duos 2

    Formatting the memory card on your Samsung Galaxy Grand Duos 2 will delete all the files that is stored on the memory card. It is recommended to backup your important files on your computer before attempting to format your memory card.

    You may not be able to reformat your memory card on your computer. So try it through your device:

    1. On your Home screen, tap Apps.

    2. Select Settings.

    3. Go to Storage.

    4. Then tap Format SD card Format SD card.

    5. Tap Erase everything to confirm the action.


    How to Import Contacts From Old Phone to New Phone (on Sony, iPhone, Samsung, HTC and Nokia)

    Contacts is very important for everyone of us. We cant connect to our friends without a contact number. If you have a new phone, saving contacts on the phone one by one is so hassle. But now, theres an easy way how to transfer or import your contacts from your old phone to your new phone.

    Use your PC to transfer contacts to your new phone. This process is applicable in several phone brands, including iPhone, Samsung, HTC and Nokia.

    You just need an Internet Connection on your PC, your old and new phone and their own USB cable.

    Then you need to install the PC Companion program. This is a free application and the installation files are already saved on your new phone. This program can also be used in updating your phone software.

    Please note that if you are using the Microsoft Windows 7 operating system on your PC, make sure that the AutoPlay setting is enabled.

    To check your settings:

    Click Start > Control Panel, then type "autoplay" on the search box. Click the AutoPlay, and mark the check box Use AutoPlay for all media and devices.

    Installing the PC Companion:

    • Turn on your new Phone and connect it to your PC.
    • On your new Phone, tap "Install" to install PC Companion on the PC.
    • On your computer, if a pop-up window that appears notifies you about available PC Software, select Run Startme.exe.
    • Then click Install to start the installation and then follow the instructions to complete the installation.

    If you are not prompted with a pop-up window to install the PC Companion, you can also download the PC Companion here.

    Transferring your contacts to your new phone:

    • Make sure that PC Companion is installed on your PC.
    • Open the PC Companion application on your PC.
    • Then click Contacts Setup and follow the instructions to transfer your contacts.


    How to Secure Your Samsung Galaxy Grand Duos 2 (Face Unlock, Face and Voice Unlock, Pattern and Password)

    Securing your Samsung Galaxy Grand Duos 2 is also important, specially if you have a private files that you dont want others to access it. So to prevent others from using your or accessing your personal data without your permission, then you may need to activate the security features. The device requires an unlock code whenever unlocking it.

    Setting a face unlock:

    1. On the Applications screen, tap Settings.
    2. Select Lock screen.
    3. Then choose Screen lock.
    4. Tap Face unlock.

    Fit your face in the frame to be captured. Then, set a backup unlock PIN or pattern to unlock the screen in case the face unlock fails.


    Setting a face and voice unlock:

    1. On the Applications screen, tap Settings.
    2. Select Lock screen.
    3. Then choose Screen lock.
    4. Tap Face and voice.

    Fit your face in the frame to be captured and then set a voice command. Then, set a backup unlock PIN or pattern to unlock the screen in case the face and voice unlock fails.


    Setting a pattern:

    1. On the Applications screen, tap Settings.
    2. Select Lock screen.
    3. Then choose Screen lock.
    4. Tap Pattern.

    Draw a pattern by connecting four dots or more, and then draw the pattern again to verify it. Set a backup unlock PIN to unlock the screen when you forget the pattern.


    Setting a PIN:

    1. On the Applications screen, tap Settings.
    2. Select Lock screen.
    3. Then choose Screen lock.
    4. Tap PIN.

    Enter at least four numbers, and then enter the password again to verify it.


    Setting a password:

    1. On the Applications screen, tap Settings.
    2. Select Lock screen.
    3. Then choose Screen lock.
    4. Tap Password.

    Enter at least four characters including numbers and symbols, and then enter the password again to verify it.


    How to Upgrade With the Latest Software on Samsung Galaxy Grand Duos 2

    Keeping your device updated with the latest software fixes bugs on your handset thus contributing to its efficiency and life span. Samsung allows you to install those updates in two ways- through Samsung Kies or Over-the-Air. Well heres how you can install those latest software firmware using this two methods.

    Upgrading with Samsung Kies

    1. First launch Samsung Kies.

    2. Then connect your phone to the computer using the USB cable that came with it.

    3. Now Samsung Kies will automatically recognizes your device and a dialogue box
    appears showing the available updates, if any.

    4. Click the update button in the dialogue box to start upgrad ting to te latest software.

    While youre upgrading the device, you shouldnt turn off the computer or disconnect
    te USB cable and dont connect other media devices to the computer as it may interfere
    the upgrading process.

    Upgrading over-the-air

    1. Go the Applications screen and then tap Settings.

    2. Then go to About device.

    3. Select Software Update then hit on Update.


    How to Make Your Samsung Galaxy Grand Duos 2 a Portable Wi-Fi Hotspot

    Smartphones these days can now share its mobile data connection and act as a portable Wi-Fi hotspot. And like those high-end gadgets, Samsung Galaxy Grand Duos 2 is sure to let you experience the benefits of making it as a portable Wi-Fi hotspot. Heres how you can make your Samsung phone the next Wi-Fi hotspot.

    1. On your device, go to Settings screen first.

    2. Then tap Wi-Fi and tap for more options.

    3. Select Advanced options to customize your Wi-Fi settings.

    4. Go to Tethering and portable hotspot.

    5. And choose Portable Wi-Fi hotspot to share the devices mobile network connection.

    And you now have a portable Wi-Fi hotspot using your Samsung Galaxy Grand Duos 2.


    How to Activate and Use Multi Window Feature on Samsung Galaxy Grand Duos 2

    Computers allow us to do multi tasking by letting its users open various windows or screens to work on. Now if you think your phones display is too small for another screen, then you are indeed underestimating what your phone can do. With Samsung Galaxy Grand Duos 2, you can still carry on with your multi tasking skill by working on not just one window but two screens at the same time. Heres how you can activate and use the Multi Window feature on your Samsung Galaxy Grand Duos 2.

    1. To activate the Multi Window feature on your phone,go to the Applications screen first.

    2. Then tap on Settings.

    3. Go to Display and tick Multi Window.

    4. To use the Multi Window just tap and holdand the Multi Window panel appears at the left side of the screen.

    5. Now select one app and drag another app to a new location. Just drag the bar between the application panels up and down to adjust the panel size.

    6. Tap the panel handle to hide or show the panel.

    7. To move an open panel, just tap and hold the handle and drag it to an edge of the screen.

    8. When a panel is hidden, tap and hold the handle and drag it up or down or left or right to move the handle.

    9. To deactivate Multi Window, tap and holdagain.

    Take note that when this feature is activated, only applications on the Multi Window panel can run. When launching applications which contains multimedia files such as music and video, sound from both files will be played. And this feature may not be available depending on your region or service provider.


    How to Install and Uninstall Apps on Samsung Galaxy Grand Duos 2

    Apps developers are remarkably making good money out of every apps they build. No wonder online stores are mostly visited by smartphone users just to check on the hottest new apps online. If youve found the perfect app for your Samsung Galaxy Grand, then follow these steps in installing and perhaps uninstalling those unwanted apps.

    Installing apps

    1. First tap on Play Store on the applications screen to view available apps online.

    2. You can browse available apps by category or simply tapto search with a keyword.

    3. Then select an application to view. To download it on your phone, tap Install. Make sure to double check the app info like its price and ratings before hitting the install button.

    4. If theres a charge for that app,tap the price and follow the onscreen instructions to purchase it.

    5. To install apps that are from other sources, just go to Applications Settings Security Unknown sources.


    Uninstalling apps

    1. In uinstalling the apps purchased from the Play Store, tap

    2. Then go to My Apps.

    3. And select an application you want to delete, then tap Uninstall.

    Read More..

    N8 HDMI Not Working how to fix problem

    This solution is for Nokia N8 HDMI Problem. If your Nokia N8 HDMI is
    not working consult the diagram below for the solution.

    You will notice that I have not made any jumper points in the diagrams
    that is because Nokia N8 HDMI connector ways directly go under the ICs
    next to it. So I have marked all the parts that can cause this problem
    check and replace if you detect any problem with the marked parts. If
    you are having trouble dissembling your phone read this post Nokia N8
    How To Dissemble Guide with Diagrams.

    Please Note that we will edit these solutions or add new ones if found
    in this page at any time in the future. So feel free to come back any
    time on this page to stay up to date.

    If you have further Questions please don't hesitate to leave a comment.

    Note: Every repairing solution posted here is tested by at least one
    member of our team. Use the information available here at Your Own
    Risk. We are not responsible if any harm comes to your device during
    the repairing process.
    Read More..

    Friday, August 22, 2014

    Nokia 2700c network Problem with Jumper Solution

    Nokia 2700c network solution.
    2700c
    Read More..

    Nokia C2 01 Charging not supported Problem New Jumper Solution

    Nokia C2-01 Charging not supported solution.
    C2-01
    Read More..